Wednesday 27 November 2013

Exporting from Explain Everything to Google Drive

Explain Everything is a great app on the iPads for students to record their thinking about a particular subject.

We have had some problems exporting the movie to the camera roll when the movie gets too long.

A solution to this is to export the completed movie to your Google Drive account. You can even export the Explain Everything file to your Google Drive so you can access it later on a different iPad.

Once you have created a movie in Explain Everything, click on the movie export icon in the bottom right of the screen.

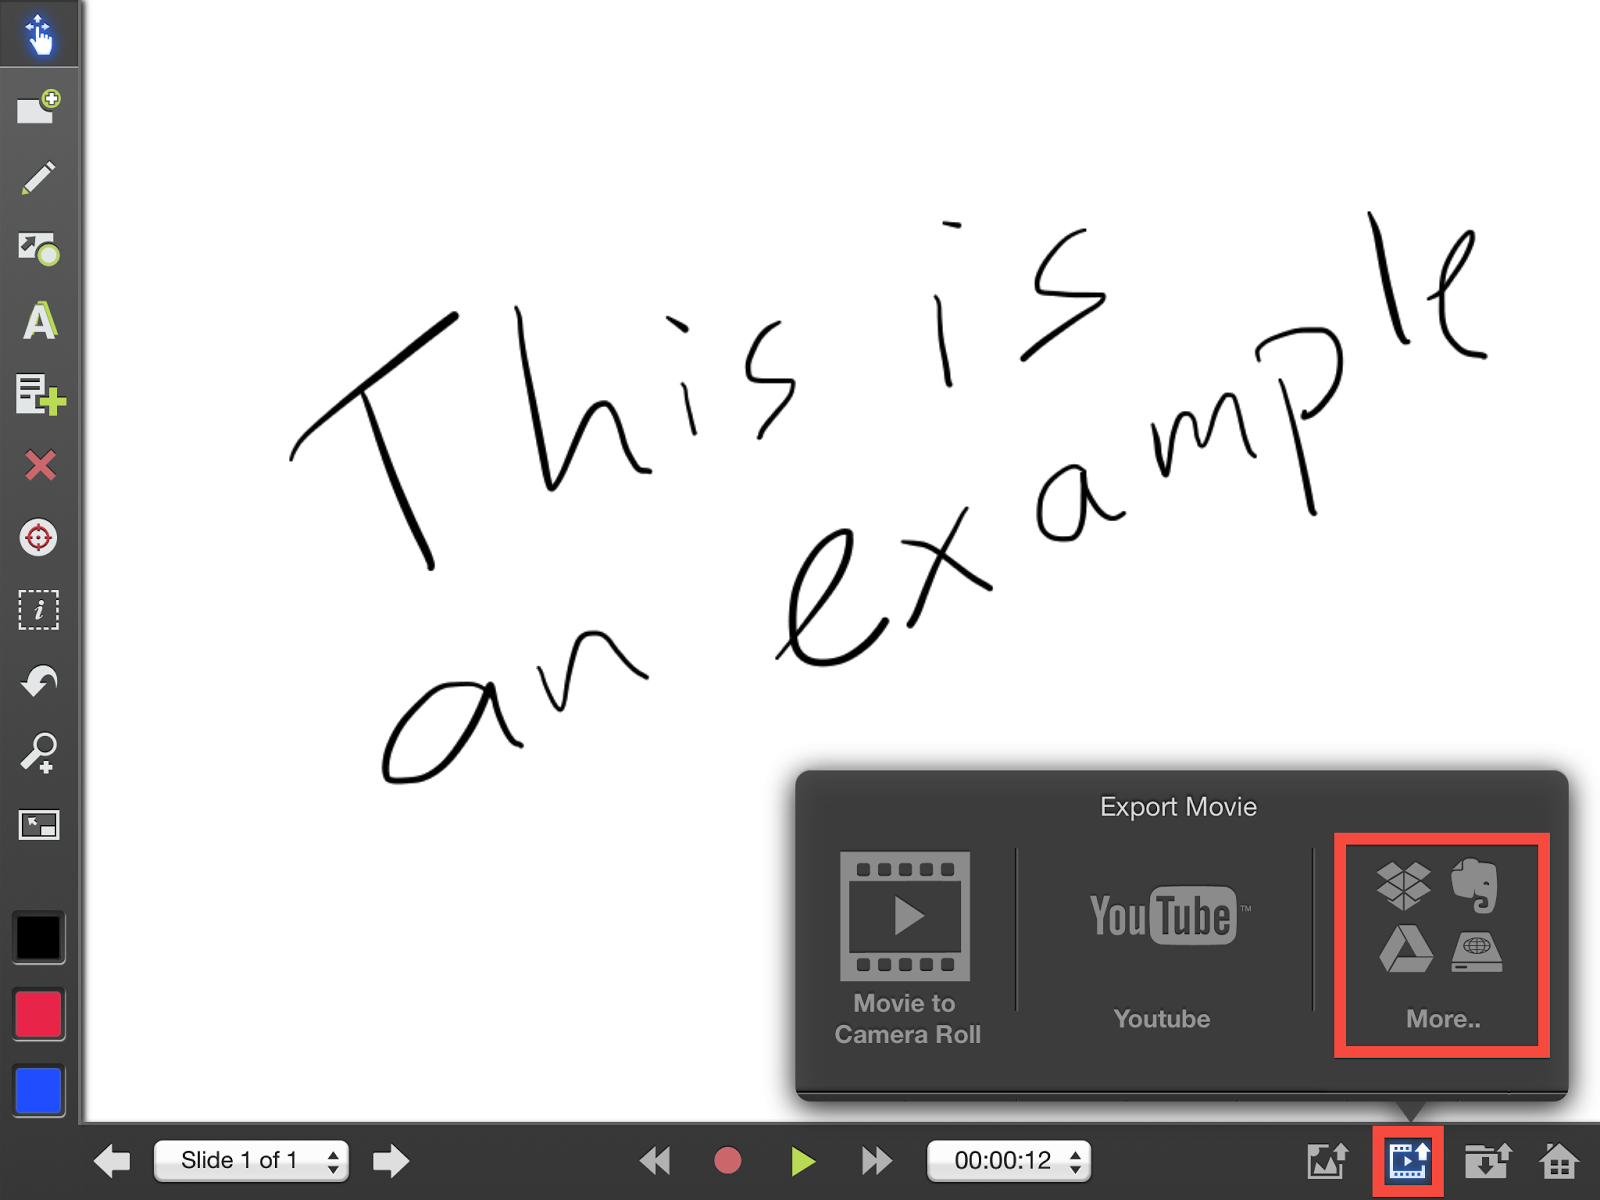
Click on the Google Drive tab on the bottom and then you will be prompted to sign in to Google Drive.


You will be prompted to sign in to Google Drive. **Very important - don't forget to include the gapps part of your email address. Ex. dac@gapps.uwcsea.edu.sg


You will then get a screen which asks if the Explain Everything app is allowed to access some of your information. Click accept. **Note: sometimes the keyboard may be in the way of the accept button. To get the keyboard out of the way, simply touch the keyboard button in the bottom right of the screen.


You can choose to either save the video file or the project. If you are done and don't need to edit the project anymore, then save the video file. If you would like to continue to edit the project later, touch the project tab.


You will be prompted to give it a name. You can also choose the folder that you would like to put the file into. Choose a name that will help you find your movie later.


The video will then be saved to your Google Drive and you will get a progress box.


Now the file has been uploaded to your Google Drive. 

Remember that you are still logged into your Google drive account. You will need to log out so other people can't access your account. To do that, go to the home page of Explain Everything (click on the house in the bottom right corner of the screen) and click on the gear in the top right of the screen. Then click on the Accounts tab and slide the Google Drive switch from "On" to "Log In". 


**Note - If you save a project to your drive, and you want to open it back in Explain Everything, you will need to open it from the Google Drive app on the iPad (Not from Explain Everything)


Friday 1 November 2013

Creating QR code with a picture

What is a QR code?

You have probably seen them in magazines and posters and even on some of the products you buy. They look like this:


They are all individualized and can be created easily (more on that later).

What do they do? 

You can use a QR code scanner app on a mobile device like your Smartphone or an iPad to scan the code. There are lots of different scanners available like Qrafter that will scan QR codes. A quick look in the app store will show you the many different options available.

When you scan a QR code with your phone or iPad, you can link to something. What exactly? Most often they link to a website but can also link to a phone number or a few other things.

They can be used in a wide variety of ways in the classroom. Teachers can create a gallery of QR codes that the students scan which takes them to different websites for information that they have to explore. You could put a QR code on a piece of portfolio work that is linked to a student's performance that has been uploaded to Vimeo or YouTube. 

How do I create a QR code?

There are many websites that will create the QR codes for you. One of my favourites is QR Code Monkey because you can put a picture inside of the QR code.


Start by going to the website that you want to link your QR code to and copy the URL (website address). Then go to QR Code Monkey and click on the URL tab and paste the address there.

If you want to add a custom image or logo in your QR code then check the box entitled "Include Logo/Image in QR-Code". Then click on the tab "Own Logo-Image" and select "Upload Image". 

If you are creating QR codes for student work that are linked to different websites, you can put a picture of the student into the QR code to help you remember which QR code belongs to which student. 

Find the image on your computer and upload it. 

Then click on the green "Create QR-Code" button and your customized QR code with picture will be created.

Then click on the "Download PNG" button and you have your QR code to print.


Thursday 12 September 2013

Problems with Keychain popup boxes that won't go away!!!

Some students are having difficulty with pop-up boxes asking for a keychain and no matter what students do or password they provide the popup box does not go away.

To solve this problem the students must delete their keychains and restart their computers. To do this please check out this video.

When they restart their computer they may have three options (see image below). They must select "Create New Keychain"


This should solve the problem.

Wednesday 28 August 2013

Changing Password

Changing passwords can take a while especially if it is your students' first time to change them.


Tuesday 27 August 2013

Mac Basics - Getting Started With Your Mac

Getting a new MacBook Air can be both exciting and daunting, particularly for new Mac users.
Apple has a number of tutorial videos and explanations which are designed to make your transition to a Mac easier. An overview of their support materials can be found here, however we have selected a few of our favourites to highlight below.

Here are a few tips to getting started with your Mac.


This is an overview on some main features of the operating system, designed to orient you to using a Mac.


This allows you to customize your Mac to meet your needs. Here you can customize the trackpad and different multitouch gestures which make the Mac such a powerful, user-friendly tool. 


The bar at the bottom of your screen is called the Dock. You can add shortcuts for your favourite applications, and create stacks for frequently used folders here.


The Finder is where you can access pretty much everything on your Mac. You can organise files and folders, delete and manage files and more.


This support document answers the question, "I used to do this on a PC. How do I do it on a Mac?" 


Monday 26 August 2013

Customizing your Class Google Site Banner

You can customize your class Google Site banner to personalize your site for your class.

Here you will find instructions as to how to customize your banner using a Keynote template, or using iPhoto.

Here's how to use the Keynote template.


Follow these steps to customize your site banner using iPhoto 

Wednesday 21 August 2013

Customizing your Blog header

You can customize your blog header in Blogger to have a more personalized picture to represent your class. Follow the steps below to change your header.


Thursday 15 August 2013

Getting Started with your Class Blogs

Each infant class has been set up with a class blog accessible from the school website (www.uwcsea.edu.sg). The purpose of the blog is to share the learning that is happening in the classroom with parents and the wider community.


1.  Log in to the school website and click on the East Learning (Note: The left hand side of the icon)


2. Select Infant or Junior as needed


3. Select your grade level


4. This will take you to your grade level page which the parents of your students will see. (Here is an example from K1)


5. Click on your name to access your class blog. It will look like this:


6. If you are signed in, you can click on the Blogger icon in the top left so you can edit your blog. 


7. Click on the name of your blog to open the editing menu


8. Click on New Post to add a new post, or click on Posts to edit a draft post.


9. Type a Title, some Labels (Keywords separated by commas) and type your message. 
You can save a post, which means your work is saved in draft form. You can edit at a later stage if you like. When you are finished the post, click Publish, which will mean your post will be visible to the public.


10. Posts do not need to be long, however we strongly recommend every post include photos. Visit this blog post to see how to embed a Picasa Slideshow.

Please feel free to contact either Dave or Keri-Lee if you would like some help with this process. 

Adding a Picasa Slideshow to your Blog

Follow these instructions to embed a Picasa Web Album to your blog.

1. Select the photos you would like to share from your iPhoto Library.


2. Click on File -> Export


3. Click on Picasa and make sure you have Better Quality selected.


4. Sign in to Picasa with your Google Apps account.


5. Click Allow access.


6. Fill in any more details (e.g. album name etc) and click Export.

7. Click on view to go to Picasa & see your album

8. Make sure your album is Public on the Web. Click on Link to this Album.


9. Click on Embed Slideshow


10. Select Large and copy the embed code in the box at the bottom.


11. Switch over to your blog and open the post you want to put the slideshow in. Create a post title, write your text, and don't forget to add some labels (Keywords).
To add the slideshow, click on the HTML button (top left).


12. Go to the end of the text, then Paste the embed code you copied earlier.


13. Click on Compose again, and you should see your slideshow embedded in your blog post. You can continue and publish from there.


Getting Started with your Class Google Site

This year, each class has been set up with its own Google Site. The purpose is to keep our parents informed about specific goings on in each class, and to host weekly homework.

Below is a screencast showing how to navigate to and get started with your class Google Site.


Each grade has been set up with a grade level page accessible from the school website (www.uwcsea.edu.sg).


1.  Log in to the school website and click on the East Learning (Note: The left hand side of the icon)


2. Select Infant or Junior as needed


3. Select your grade level


4. This will take you to your grade level page which the parents of your students will see. (Here is an example from grade 3)


5. In the sidebar on the left there are links to information about your grade (Academics, Activities, Outdoor education, Personal and Social Education, Service and Announcements).

6. To go to your personal page, click on your picture.

7. Once in your personal page click on "New Post"


8. Change the Title of the post from "Untitled Post" to the week and date of your post (eg. Week 1 - August 19-23)

*NOTE - at this moment when you type in the title of the post, you can't see what you type. To work around this, type the title you would like in the body of the post and copy and paste it in the title. See the video at the top of this page for an example.


9.  Write what you would like to share with the parents in the space below your title.

10. If you would like to add pictures into your post, put your cursor where you would like to put your picture and select Insert > Image from the menu bar.


11. Click on Choose File.
12. Find your image and select Open.


13. Another dialogue box will open. Click on the picture so it is highlighted and select Ok.

14. The image may display in your post as a different size than you would like it to be. 

To change the size, locate the popover display bar. To the right of the word "Image" you have options to place your image left, center or right of your page. 

Beside that you can select the size of the image as small (S), medium (M) or large (L). Select the size that you would like for your post.